
To add editable text to an AI-generated product image, place the image on your canvas and create the headline with the Text tool. Keep the headline, supporting copy, and call to action as separate text objects. You can then change the wording or layout without generating the product scene again.
The distinction matters: a canvas text object is editable; lettering already baked into a photograph or generated image is part of that image. Uploading a finished poster does not automatically separate its words into editable objects.
This guide uses existing CubbieAI demonstration artwork to discuss layout choices. The pictures are flattened illustrations, not screenshots proving that their existing lettering can be edited. The suggested steps and prompt should be checked against your own project before publishing a finished ad.
Start with an image that has room for a headline
A useful ad background leaves enough quiet space for its message. If every corner contains a product, texture, or decorative prop, even a short headline can be difficult to place.
Consider this blue-chair scene:

The orange-and-blue contrast is strong, but the framed wall art competes for headline space. Plan the text placement before deciding the image is finished.
If you are generating a new scene, describe where you want the product and where the text will sit. For example:
Use the selected blue chair as the product reference for a furniture ad.
Place the chair in the lower half of a warm terracotta interior.
Leave the upper third as a simple, softly lit wall for a separate headline.
Do not add framed pictures, signs, lettering, logos, prices, or watermarks.
Keep the chair's appearance consistent with the product reference.
This is a starting prompt, not a tested recipe with a guaranteed output. Check both the reserved text area and the product details in the result.
If you already have an image with usable space, you can start adding text directly. Regeneration is only one way to change a scene; it is not required to create a text object.
1. Add the headline with the Text tool
With your image on the canvas, choose Text from the drawing toolbar and place the headline where you want it. Enter a short message first, then adjust its size and position using the canvas controls.
For a furniture collection announcement, you could start with:
Form meets comfort.Use a message that accurately represents your product. A headline does not need to contain every feature, material, and selling point. Choose the one idea this particular ad should communicate.
Keep the text away from details buyers need to see. For the chair, that includes the backrest and seat shape. For a bottle, it might include the label or cap.
2. Give each piece of copy its own object
Put the headline, supporting line, and call to action in separate text objects when you want to move or style them independently.
| Text object | Example copy | Purpose |
|---|---|---|
| Headline | Form meets comfort. | Communicates the main idea |
| Supporting line | Discover the collection. | Adds context when needed |
| Call to action | Explore the collection | Suggests the next step |
| Optional offer | Your verified price or offer | Gives current, accurate purchase information |
The examples are alternatives to adapt, not a requirement to use every row. If the supporting line and call to action repeat each other, keep the one that helps the reader most.
For an offer, enter your real terms. Do not add a fictional discount, review score, deadline, or claim to make a demonstration look convincing.
Separate objects make common revisions simpler. You can shorten a headline without rewriting the offer, or reposition a call to action without moving the rest of the copy.
3. Make the message readable against the background
Review the layout at a smaller viewing size as well as zoomed in. A headline that is easy to read on a large editing canvas may become awkward on a phone.
Work through three decisions:
- Placement: put text in the quiet area of the image, leaving the product visible.
- Contrast: choose a text color that remains distinct across the area behind the words.
- Hierarchy: make the main message easiest to notice and keep supporting information secondary.
If the background changes from dark to light behind the same line of text, moving the words can work better than changing their color repeatedly. A simple shape behind the text is another option; check its object order so it sits behind the words and does not cover the product.
Here is a finished layout illustration from the existing chair campaign:
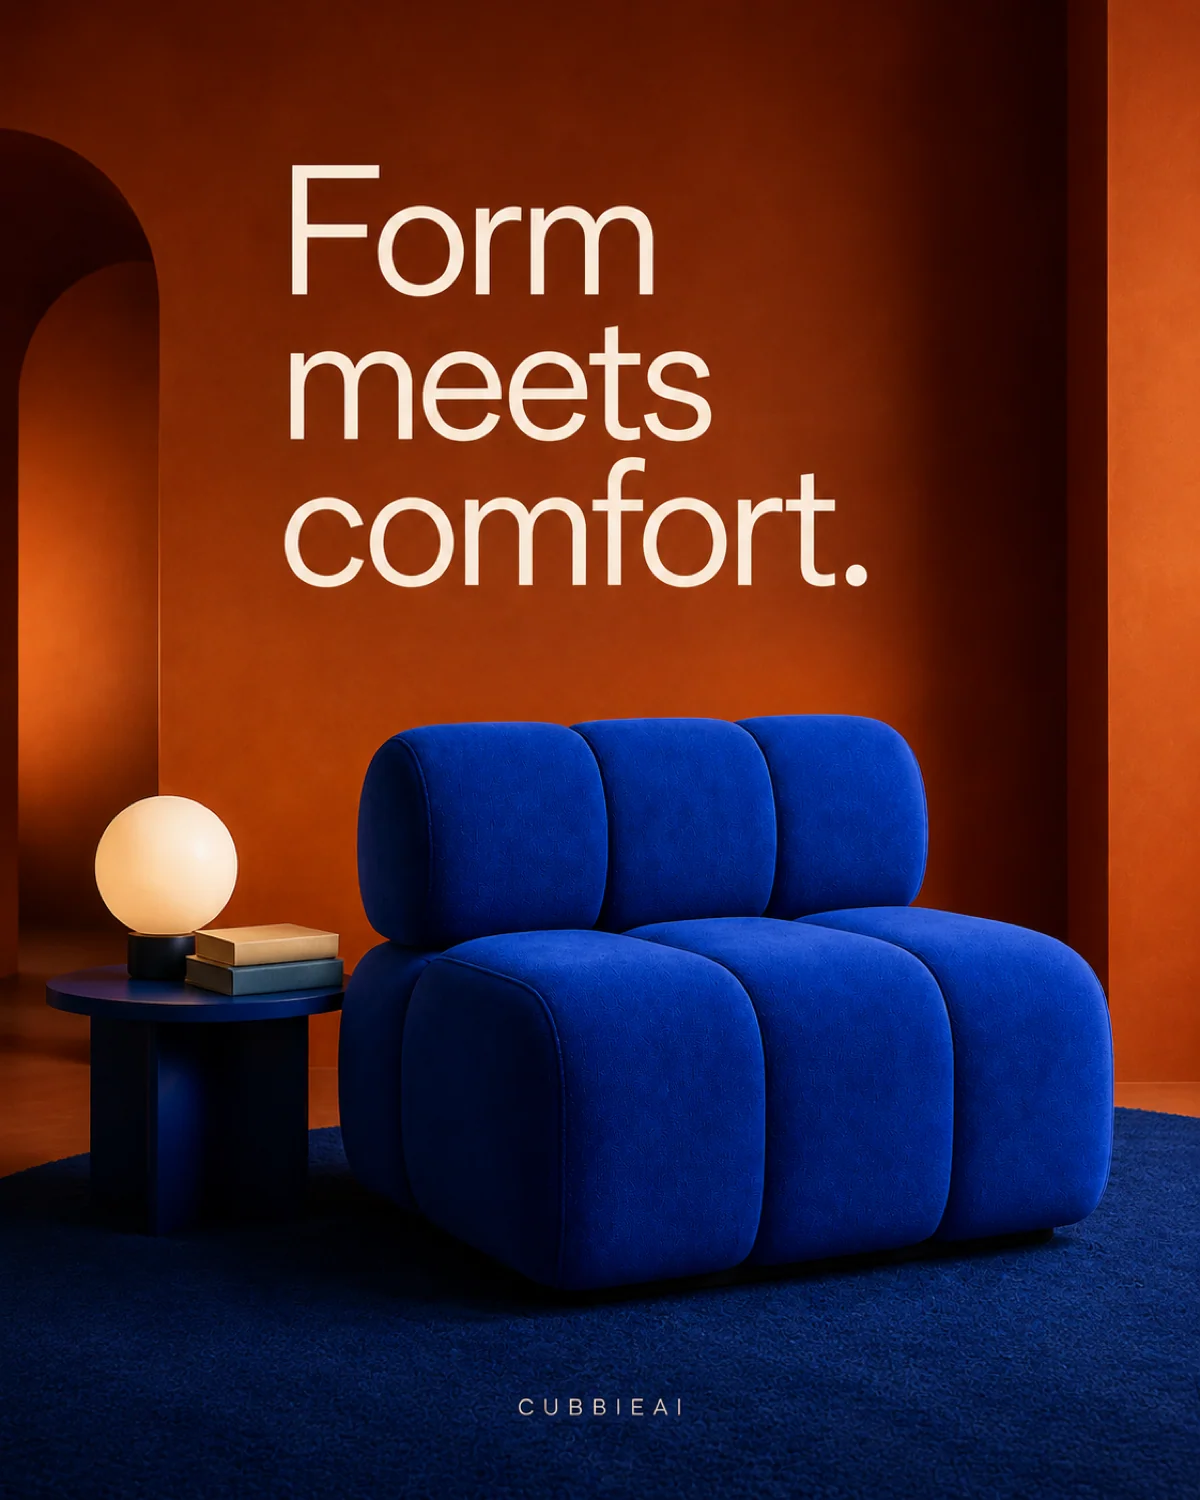
The headline uses the upper area while the chair remains prominent below. The existing text in this illustration is flattened; create your own separate text objects to make an editable working layout.
4. Revise the copy without rebuilding the scene
Edit the canvas text object when the headline changes. For example, a later campaign may need “Meet your new favorite seat” instead of “Form meets comfort.” After changing the wording, check its line breaks, width, and distance from the product.
A longer headline often needs more than a smaller font. Try a shorter phrase or a different line break before squeezing several lines into a narrow space.
For another offer or language version, use Project center → Duplicate current project to create a separate working copy. Keep the original layout, then update the copy in the duplicate. Review longer translations and different currency formats individually rather than assuming the original arrangement will still fit.
The duplicate-project entry exists in Studio. Check that the copied images and text are available in your project before making further changes.
5. Keep the project editable and check the exported PNG
Your editable layout lives in the Studio project. Export produces a PNG of the visible composition; the downloaded image does not preserve separate editable text objects.
Keep the project for future changes. Studio also provides project backup export and import entries under Project and canvas settings. A project backup serves a different purpose from the final PNG you use in a campaign.
Before exporting, prepare the canvas so that references and unused alternatives do not become part of the final ad. If needed, duplicate the project and prepare that copy for delivery.
Open the exported file and check the spelling, product details, offer terms, and composition. Verify its actual dimensions against the destination’s requirements. If you find a typo, return to the working project, edit the text object, and export an updated file.
The PNG export walkthrough explains how to prepare a delivery copy and troubleshoot extra content in the downloaded image.
Common questions about editable text
Can I change words already inside a generated image?
They are part of the image, not independent text objects. This workflow does not automatically extract them into editable typography. Use an image without the unwanted lettering, revise the background, or start from another scene before adding your own text.
Why does my text seem hidden?
Check the position and object order, and whether its color blends into the background. Text behind an image or a solid shape may be present in the project but not visible in the final composition.
Is a button drawn on the canvas clickable in an exported ad?
No. A shape with “Shop now” written on it is visual content in the PNG. Configure the actual destination URL or platform button where you publish the ad.
Can I update the price later?
Yes, if you kept the price as a text object in the Studio project. Update it there, check the rest of the offer, and export a new image. Changing a project does not update PNG files already uploaded elsewhere.
Finish the image and the message together
Start with a scene that leaves room for copy, add the headline as its own text object, and keep the working project for revisions. You can build this into the complete product-ad workflow, or use the multiple-reference guide to plan the scene first.
Open CubbieAI Studio, bring in a product image, and add one short headline with the Text tool.